By Kellene Bishop I’ve encountered some pretty strong facial expressions when I insinuate that having SPAM in one’s food storage is an asset. And to be forthright, I totally get it. Even when we were dirt poor, my mother never made us eat it. However, I wasn’t educated in matters of emergency preparedness then either. But I certainly am now, and as a result, have come to embrace the wonders of SPAM. I’ve discovered that if I cook with it much like I would chicken or pork in a recipe, then it’s delightful.
And no, the irony that I’m writing about SPAM today in face of the Swine Flu has not escaped me. I guess I’m just warped that way.
I have some great recipes that I’ve tried out and adapted for “food storage” available ingredients, but before I do that, I thought I’d share a couple of factoids about SPAM for you.
A 2 ounce serving contains 7 grams of protein and 15 grams of fat—two important components for the body during an emergency.
Residents of Hawaii and Guam consume the most amount of SPAM per capita than any of the other areas, including 41 countries in which SPAM is sold. In fact, SPAM is sold on the McDonald’s menu in Guam and the Burger King menu in Hawaii—known as the “Hawaiian Steak.” SPAM was widely used during World War II in Okinawa and the Philippines due to it being an effective way to get meat to the front lines. Soldiers had to eat it for breakfast, lunch, and dinner. As such, they began to joke that SPAM was simply “ham that didn’t pass its physical” or “meatloaf without basic training.” Surpluses of SPAM from the soldiers' supplies made their way into native diets. Consequently, SPAM is a unique part of the history and effects of U.S. influence in the Pacific.
SPAM comes in 12 different flavor varieties, including garlic, hot and spicy, and a roasted turkey version.
Due to its low cost, it’s long been stigmatized as “poor people food.”
SPAM is consumed all over the world in fried rice, stir fried with noodles, in sandwiches, burritos, and fried on the sides and served with eggs. It’s even been used in sushi rolls.
Every year, Austin, MN has a Jam celebration in honor of the food which includes fireworks and a carnival-type setting. Waikiki, HI does something similar as well each year. Austin, TX holds a Spamarama each year which conducts a Cook-off Contest as well.
My suggestion is that you begin familiarizing yourself with SPAM now, so that you can successfully use it in your meal preparation in the (not so distant?) future.
Fritatta
3 tbsp butter or oleo or vegetable oil
7-oz can SPAM, cubed
1/4"1/2 cup of dried chopped onion
10 pitted black olives, chopped
1/2 cup of dried chopped green pepper
6 eggs (or equivalent of dried eggs, rehydrated)
2 medium potatoes, peeled and cubed (or dried equivalent)
2 tbsp water
1/4 tsp pepper
In 10-inch omelet pan or skillet, melt 2 tbsp butter over medium heat. Add onion, green pepper and potatoes; cook over medium heat, stirring occasionally, until vegetables are crisply tender (5 to 7 minutes). Add SPAM and olives; continue cooking until SPAM is heated through. Loosen sautéed ingredients from bottom of pan; add remaining 1 tbsp butter. Tilt pan to cover bottom with butter. In small bowl mix eggs, water, and pepper; pour over SPAM mixture. Cover; cook over low heat 12 to 15 minutes or until egg mixture is set on top. With pancake turner, loosen edges and bottom; invert onto serving platter. Yield: 6 servings
Hearty Spam and Bean Soup
2 cups dried pinto beans, wash and soak overnight (or make this in a pressure cooker)
12 oz can SPAM, cubed 1/2"
3 cloves garlic, minced
2 tbsp chili powder
1/4 cup firmly packed brown sugar
1 quart water
3 bay leaves
1 tsp oregano
1 tsp thyme
1 tsp cumin
2 (13-oz) cans tomato juice
1 (14-oz) cans chicken stock
1 medium onion, chopped (or dried equivalent)
In 4-quart saucepan add all ingredients; stir to blend. Cook over medium heat until mixture comes to a boil. Boil for 10 minutes. Reduce heat to low; continue cooking, stirring occasionally, until soup is thickened (3 to 4 hours or 30 minutes in a pressure cooker). Remove bay leaves. Yield: 6 servings
Spaghetti SPAM Carbonara
1 1/2 lbs spaghetti
3 tbsp butter3 tbsp olive oil
12-oz can SPAM, cubed 1/4"
1/2 cup chopped onion
4 eggs, slightly beaten
1/2 cups grated parmesan cheese
1/4 cup chopped fresh parsleyground pepper
Cook spaghetti according to package directions. Meanwhile, in skillet cook SPAM and onion in oil and butter over medium heat until lightly browned. Set aside. When spaghetti is cooked, drain; return to pot. Add eggs; toss to combine. Add SPAM mixture, cheese and parsley; toss to combine. Season to taste with pepper. Serve immediately. Yield: 6 servings.
Copyright 2009 Kellene Bishop. All rights reserved.
You are welcome to repost this information so long as it is credited to Kellene Bishop.
Showing posts with label food storage recipes. Show all posts
Showing posts with label food storage recipes. Show all posts
Wednesday, April 29, 2009
Embracing SPAM

Monday, March 2, 2009
How to Prepare for an Emergency on a Tight Budget?
Another message and another recipe.
This time I’m going to start with the recipe. It’s called Chicken a la Queen, and it’s great whether you find yourself in an emergency survival situation and living off of your food storage or not.
 Chicken a la Queen
2 5-ounce cans of boneless chicken or turkey meat
2 cups of uncooked elbow macaroni
½ cup of minced onion
1/3 cup cooking oil
2 8-ounce cans tomato sauce
1 ¼ cups of water
Salt and pepper to taste
¼ cup of grated cheddar cheese. (Of COURSE I use more than that. You can also substitute Velvetta cheese if necessary.
 Dice the meat if it is in large chunks. Set aside chicken in natural juices from the cans. Sauté UNCOOKED macaroni and onion in hot oil in large skillet until macaroni turns slightly yellow. Add tomato sauce, water, salt, and pepper. Bring to boil; cover and simmer 15 minutes. Mix in chicken and juices; simmer 5 minutes more. Sprinkle the top with cheese.
For those of you who I’ve heard from constantly that claim you aren’t able to afford to be prepared, this one is for you.
First of all, I’ve discovered http://pinchingyourpennies.com/. It’s really, really great and replaces all of the time that you would have to spend pouring over coupons. And it’s FREE membership, unlike many sites. A large troupe of women volunteer their time every day to make sure you’ve got the best deals available. You can even end up spending a 10th of the price of groceries with their help.
 More importantly, I have this message to those of you who aren’t able to afford to stock up on food and other supplies in order to be ready in an emergency. If you are short money, you need to make up for it in time…time in the library, time on the internet, and time in classes. You need to posses the knowledge which is available freely so that you can sew, make soap, start a fire (preferably outside J), repair shoes, sprout seeds, garden, cooking with a Dutch Oven, and so many other life skills that will truly save your life if you’re having living off of only what you can garner. Not having money in this day and age is no excuse for not being ready. If you have these kinds of skills you will be able to trade for what you need and you will be an asset to your community rather than a liability. If you’re not building up the Kingdom of heaven, then you’re sucking it dry. So get as much knowledge as possible in this regard. There are no excuses to not be ready for a disaster. Just poor choices.
Be safe and be prepared,
Kellene
Copyright 2009 Kellene Bishop. All rights reserved. You are welcome to repost this information so long as it is credited to Kellene Bishop.
Preparedness Pro Note: If you would like Kellene Bishop to present an Emergency Preparedness message for your community or church group, please contact us at 801-788-4133. Ms. Bishop is an experienced speaker on Emergency Preparedness topics and also has created a great “Preparedness Party” platform which makes the learning of such a topic more enjoyable for all.
This time I’m going to start with the recipe. It’s called Chicken a la Queen, and it’s great whether you find yourself in an emergency survival situation and living off of your food storage or not.
 Chicken a la Queen
2 5-ounce cans of boneless chicken or turkey meat
2 cups of uncooked elbow macaroni
½ cup of minced onion
1/3 cup cooking oil
2 8-ounce cans tomato sauce
1 ¼ cups of water
Salt and pepper to taste
¼ cup of grated cheddar cheese. (Of COURSE I use more than that. You can also substitute Velvetta cheese if necessary.
 Dice the meat if it is in large chunks. Set aside chicken in natural juices from the cans. Sauté UNCOOKED macaroni and onion in hot oil in large skillet until macaroni turns slightly yellow. Add tomato sauce, water, salt, and pepper. Bring to boil; cover and simmer 15 minutes. Mix in chicken and juices; simmer 5 minutes more. Sprinkle the top with cheese.
For those of you who I’ve heard from constantly that claim you aren’t able to afford to be prepared, this one is for you.
First of all, I’ve discovered http://pinchingyourpennies.com/. It’s really, really great and replaces all of the time that you would have to spend pouring over coupons. And it’s FREE membership, unlike many sites. A large troupe of women volunteer their time every day to make sure you’ve got the best deals available. You can even end up spending a 10th of the price of groceries with their help.
 More importantly, I have this message to those of you who aren’t able to afford to stock up on food and other supplies in order to be ready in an emergency. If you are short money, you need to make up for it in time…time in the library, time on the internet, and time in classes. You need to posses the knowledge which is available freely so that you can sew, make soap, start a fire (preferably outside J), repair shoes, sprout seeds, garden, cooking with a Dutch Oven, and so many other life skills that will truly save your life if you’re having living off of only what you can garner. Not having money in this day and age is no excuse for not being ready. If you have these kinds of skills you will be able to trade for what you need and you will be an asset to your community rather than a liability. If you’re not building up the Kingdom of heaven, then you’re sucking it dry. So get as much knowledge as possible in this regard. There are no excuses to not be ready for a disaster. Just poor choices.
Be safe and be prepared,
Kellene
Copyright 2009 Kellene Bishop. All rights reserved. You are welcome to repost this information so long as it is credited to Kellene Bishop.
Preparedness Pro Note: If you would like Kellene Bishop to present an Emergency Preparedness message for your community or church group, please contact us at 801-788-4133. Ms. Bishop is an experienced speaker on Emergency Preparedness topics and also has created a great “Preparedness Party” platform which makes the learning of such a topic more enjoyable for all.
Wednesday, February 25, 2009
Why You Will LOVE a Pressure Cooker!
A couple years ago I was interviewed by a magazine and asked what was it that I couldn’t live without? I replied that other than my husband, I couldn’t live without my pressure cooker -- but it was a close tie. J I am so absolutely in love with all of the features of a quality pressure cooker, that I’m out to convert every person who considers themselves a cook, or concerned with emergency preparedness.
 When I mention a pressure cooker to most, they have images of one blowing up in their grandmother’s kitchen, or at least making some frightening hissing and clanking noise. A lot of people only think of a pressure cooker for canning. But here’s the good news. You can cook like an absolute pro in no time with a pressure cooker today. They’ve come a long way since their initial popularity during World War II. And the good quality ones are a must in every kitchen. The one that I highly recommend is a Kuhn Rikon. It has 3 safety features on it and has a fabulous quality otherwise. But let’s cut straight to the perks of a pressure cooker. Bottom line, if I had to choose between a microwave and a pressure cooker, I would hands down go with a pressure cooker. You’re reducing the cooking time of at least two-thirds and yet you don’t sacrifice flavor, tenderness, or quality.
Here are a couple of examples of cooking times: whole beef or pork roast with the BEST gravy every - 45 minutes. Artichokes - 15 minutes. Whole, long-grained rice - 5-6 minutes. Risotto - 8-10 minutes. Cheesecake - 12 minutes. Frozen chicken breasts - 10-12 minutes (and VERY tender). Mashed Potatoes, 3-5 minutes. Whole lamb, 35 minutes, etc, etc.
 Do you love a good pot roast? How about creating a fabulous pot roast with the most effortless savory gravy in under 45 minutes? Once you make mashed potatoes in this thing, you’ll wonder how you ever did without it. How about getting home from work wondering what in the world to prepare and only see frozen chicken breasts in the freezer? With a pressure cooker you can take those frozen chicken breasts and a jar of BBQ sauce and have a yummy, tender chicken dish in less than 15 minutes!
What a pressure cooker does is exactly what the name implies. It creates a hot sealed pressure within the pan to cook anything inside. You’re creating 8 pounds of pressure per square inch above external pressure. Typical boiling heat is 212 degrees. However, with a pressure cooker, you’re cooking on high at 254 degrees Fahrenheit. Due to the sealed system, your not losing any of the flavor or moisture from your food, in fact, you’re infusing it!
You will need less water, less spices, less fuel for heating and less time with your pressure cooker.
Here are a few of points that I love to make when it comes to using a pressure cooker.
 1) You can make so much in a pressure cooker—from roasts, to stews, even to desserts such as cheesecake.
2) Even if you have some meat that’s suffered a bit of freezer burn, you can salvage it in your pressure cooker because moisture is infused into it.
3) So long as you have sufficient moisture/liquid in your dish, you don’t have to worry about over cooking or burning a dish. A meat dish, for example, may not end up turning out in the consistency you had imagined should you forget about it for a few minutes, but it will still be tasty. It just may determine whether you need a knife or not for the dish.
4) I love to dump a bunch of chicken in the pressure cooker, cook it about 7 minutes per pound, and then just use a fork to shred it with—effortlessly. I can then use the broth for other dishes and the chicken for the myriad of casseroles I make. Add just a tad bit of veggies and you’ve got a very inexpensive chicken broth!
 5) Foods are healthier with a pressure cooker. When you cook green beans, peas, or broccoli, you’ll discover that even though their sufficiently cooked and tender they are still a beautiful green. The reason is the nutrients and color don’t escape with the evaporating steam. It stays in the pan under pressure! The pressured steam actually intensifies the flavor of your foods, so your vegetables actually taste fresher!
6) Instead of boiling the pasta, then making the sauce and adding everything else, you can literally throw it all in there and end up with a GREAT dish!
7) When you cook potatoes for mashed potatoes dish you will notice a difference when you prepare the potatoes in the pressure cooker. You do not need to cut the potatoes in small pieces. I usually just cut the potato in fourths and then cook them. You will need very little mashing afterwards, and you can easily add garlic to infuse a yummy taste in your potatoes as well!
8) When you make a pot roast (or any kind of roast) you can seer it right in the pressure cooker, then add your liquid and seasonings. Cook the meat and then the last 10 minutes you add the vegetables. When you’re done, you will have a YUMMY gravy that’s just the right consistency as it will be naturally thickened with the starches in your potatoes and carrots. And the roast will be fork tender as well! Ooh. I’m getting hungry just writing about this!
9) Artichokes typically take about 45 minutes to cook. Only 10 to 15 minutes in pressure cooker though, and they are much more flavorful!
10) Rice and risotto cook effortlessly in a pressure cooker as well. And you can really spice things up with small amounts of seasonings too.
 11) In the event of an emergency, if you need to conserve water, fuel, and personal energy, a pressure cooker will really come in handy. If you bring the pressure cooker up to high pressure, you can turn off the heat source, wrap the pressure cooker up in towels, and then continue to cook the contents for as much as another hour (Not that I can think of anything that takes an hour to make in a pressure cooker). Even in everyday cooking you will find that it takes significantly less fuel or electricity to cook your items.
12) Pressure cooker will keep your food warm without ruining it. My husband never seems to come for dinner right when I’m ready. I don’t mind so much when I’ve used a pressure cooker though because dinner will stay nice and warm and meat will simply get more tender. (Although I do hate it when he’s late when I’ve made vegetables… sometimes you don’t want them more tender)
Bottom line, there’s a whole new world of successful cooking waiting for you with a pressure cooker. And it’s a great asset in the event of having to cook in an emergency. In fact, in many of the European countries that don’t have a reliable source of fuel and electricity whenever it’s desired, you will see 2 or 3 pressure cookers in every kitchen. It’s a realistic way of life for them. And it’s an exciting way of life for you to take on. It makes your life easier, your food healthier, and maximizes your time in the kitchen.
So give it a try. You’ll love the benefits now and later.
Here’s one of my favorite recipes for a pressure cooker. It’s a luxury comfort food. I like to buy the Italian cheese mix at Costco - it comes in a clear plastic container.
Four Cheese Italian Risotto (Serves 6-8)
INGREDIENTS:
2 Tbsp. unsalted butter
1 Tbsp. olive oil
1/2 cup finely chopped onion
2 cups Arborio rice (found in Harmon’s and Target)
1/2 cup dry white wine, or white cooking wine
4-1/2 cups chicken broth
1/2 cup freshly grated Parmesan cheese (I use an Italian 4-cheese blend)
1/2 tsp. salt
1/8 tsp. pepper
½ tsp. fresh ground nutmeg (optional)
PREPARATION: Combine 1 Tbsp. of the butter and all of the olive oil in the pressure cooker and heat, uncovered, over medium-high heat. Add the onion and cook, stirring with a wooden spoon, until the onion begins to soften, 2 to 3 minutes. Be careful not to brown the onion or the butter. Stir in the rice to coat the grains with the fat and onion mixture, and cook about 1 minute longer. Add the wine and cook, stirring, until it is mostly absorbed by the rice. Add 4 cups of the broth. Cover the pressure cooker according to the manufacturer's instructions, increase the heat to high, bring the pressure up to high, and cook for 10 minutes. Turn off the heat and release pressure quickly, according to manufacture’s instructions. Remove the lid. Add the remaining 1/2 cup broth, 1 Tbsp. butter, and the cheese and stir well to combine with the rice. Season with the salt and pepper to taste. Serve immediately. Serves 4-6
Copyright 2009 Kellene Bishop. All rights reserved. You are welcome to repost this information so long as it is credited to Kellene Bishop.
Preparedness Pro Note: If you would like Kellene Bishop to present an Emergency Preparedness message for your community or church group, please contact us at 801-788-4133. Ms. Bishop is an experienced speaker on Emergency Preparedness topics and also has created a great “Preparedness Party” platform which makes the learning of such a topic more enjoyable for all.
 When I mention a pressure cooker to most, they have images of one blowing up in their grandmother’s kitchen, or at least making some frightening hissing and clanking noise. A lot of people only think of a pressure cooker for canning. But here’s the good news. You can cook like an absolute pro in no time with a pressure cooker today. They’ve come a long way since their initial popularity during World War II. And the good quality ones are a must in every kitchen. The one that I highly recommend is a Kuhn Rikon. It has 3 safety features on it and has a fabulous quality otherwise. But let’s cut straight to the perks of a pressure cooker. Bottom line, if I had to choose between a microwave and a pressure cooker, I would hands down go with a pressure cooker. You’re reducing the cooking time of at least two-thirds and yet you don’t sacrifice flavor, tenderness, or quality.
Here are a couple of examples of cooking times: whole beef or pork roast with the BEST gravy every - 45 minutes. Artichokes - 15 minutes. Whole, long-grained rice - 5-6 minutes. Risotto - 8-10 minutes. Cheesecake - 12 minutes. Frozen chicken breasts - 10-12 minutes (and VERY tender). Mashed Potatoes, 3-5 minutes. Whole lamb, 35 minutes, etc, etc.
 Do you love a good pot roast? How about creating a fabulous pot roast with the most effortless savory gravy in under 45 minutes? Once you make mashed potatoes in this thing, you’ll wonder how you ever did without it. How about getting home from work wondering what in the world to prepare and only see frozen chicken breasts in the freezer? With a pressure cooker you can take those frozen chicken breasts and a jar of BBQ sauce and have a yummy, tender chicken dish in less than 15 minutes!
What a pressure cooker does is exactly what the name implies. It creates a hot sealed pressure within the pan to cook anything inside. You’re creating 8 pounds of pressure per square inch above external pressure. Typical boiling heat is 212 degrees. However, with a pressure cooker, you’re cooking on high at 254 degrees Fahrenheit. Due to the sealed system, your not losing any of the flavor or moisture from your food, in fact, you’re infusing it!
You will need less water, less spices, less fuel for heating and less time with your pressure cooker.
Here are a few of points that I love to make when it comes to using a pressure cooker.
 1) You can make so much in a pressure cooker—from roasts, to stews, even to desserts such as cheesecake.
2) Even if you have some meat that’s suffered a bit of freezer burn, you can salvage it in your pressure cooker because moisture is infused into it.
3) So long as you have sufficient moisture/liquid in your dish, you don’t have to worry about over cooking or burning a dish. A meat dish, for example, may not end up turning out in the consistency you had imagined should you forget about it for a few minutes, but it will still be tasty. It just may determine whether you need a knife or not for the dish.
4) I love to dump a bunch of chicken in the pressure cooker, cook it about 7 minutes per pound, and then just use a fork to shred it with—effortlessly. I can then use the broth for other dishes and the chicken for the myriad of casseroles I make. Add just a tad bit of veggies and you’ve got a very inexpensive chicken broth!
 5) Foods are healthier with a pressure cooker. When you cook green beans, peas, or broccoli, you’ll discover that even though their sufficiently cooked and tender they are still a beautiful green. The reason is the nutrients and color don’t escape with the evaporating steam. It stays in the pan under pressure! The pressured steam actually intensifies the flavor of your foods, so your vegetables actually taste fresher!
6) Instead of boiling the pasta, then making the sauce and adding everything else, you can literally throw it all in there and end up with a GREAT dish!
7) When you cook potatoes for mashed potatoes dish you will notice a difference when you prepare the potatoes in the pressure cooker. You do not need to cut the potatoes in small pieces. I usually just cut the potato in fourths and then cook them. You will need very little mashing afterwards, and you can easily add garlic to infuse a yummy taste in your potatoes as well!
8) When you make a pot roast (or any kind of roast) you can seer it right in the pressure cooker, then add your liquid and seasonings. Cook the meat and then the last 10 minutes you add the vegetables. When you’re done, you will have a YUMMY gravy that’s just the right consistency as it will be naturally thickened with the starches in your potatoes and carrots. And the roast will be fork tender as well! Ooh. I’m getting hungry just writing about this!
9) Artichokes typically take about 45 minutes to cook. Only 10 to 15 minutes in pressure cooker though, and they are much more flavorful!
10) Rice and risotto cook effortlessly in a pressure cooker as well. And you can really spice things up with small amounts of seasonings too.
 11) In the event of an emergency, if you need to conserve water, fuel, and personal energy, a pressure cooker will really come in handy. If you bring the pressure cooker up to high pressure, you can turn off the heat source, wrap the pressure cooker up in towels, and then continue to cook the contents for as much as another hour (Not that I can think of anything that takes an hour to make in a pressure cooker). Even in everyday cooking you will find that it takes significantly less fuel or electricity to cook your items.
12) Pressure cooker will keep your food warm without ruining it. My husband never seems to come for dinner right when I’m ready. I don’t mind so much when I’ve used a pressure cooker though because dinner will stay nice and warm and meat will simply get more tender. (Although I do hate it when he’s late when I’ve made vegetables… sometimes you don’t want them more tender)
Bottom line, there’s a whole new world of successful cooking waiting for you with a pressure cooker. And it’s a great asset in the event of having to cook in an emergency. In fact, in many of the European countries that don’t have a reliable source of fuel and electricity whenever it’s desired, you will see 2 or 3 pressure cookers in every kitchen. It’s a realistic way of life for them. And it’s an exciting way of life for you to take on. It makes your life easier, your food healthier, and maximizes your time in the kitchen.
So give it a try. You’ll love the benefits now and later.
Here’s one of my favorite recipes for a pressure cooker. It’s a luxury comfort food. I like to buy the Italian cheese mix at Costco - it comes in a clear plastic container.
Four Cheese Italian Risotto (Serves 6-8)
INGREDIENTS:
2 Tbsp. unsalted butter
1 Tbsp. olive oil
1/2 cup finely chopped onion
2 cups Arborio rice (found in Harmon’s and Target)
1/2 cup dry white wine, or white cooking wine
4-1/2 cups chicken broth
1/2 cup freshly grated Parmesan cheese (I use an Italian 4-cheese blend)
1/2 tsp. salt
1/8 tsp. pepper
½ tsp. fresh ground nutmeg (optional)
PREPARATION: Combine 1 Tbsp. of the butter and all of the olive oil in the pressure cooker and heat, uncovered, over medium-high heat. Add the onion and cook, stirring with a wooden spoon, until the onion begins to soften, 2 to 3 minutes. Be careful not to brown the onion or the butter. Stir in the rice to coat the grains with the fat and onion mixture, and cook about 1 minute longer. Add the wine and cook, stirring, until it is mostly absorbed by the rice. Add 4 cups of the broth. Cover the pressure cooker according to the manufacturer's instructions, increase the heat to high, bring the pressure up to high, and cook for 10 minutes. Turn off the heat and release pressure quickly, according to manufacture’s instructions. Remove the lid. Add the remaining 1/2 cup broth, 1 Tbsp. butter, and the cheese and stir well to combine with the rice. Season with the salt and pepper to taste. Serve immediately. Serves 4-6
Copyright 2009 Kellene Bishop. All rights reserved. You are welcome to repost this information so long as it is credited to Kellene Bishop.
Preparedness Pro Note: If you would like Kellene Bishop to present an Emergency Preparedness message for your community or church group, please contact us at 801-788-4133. Ms. Bishop is an experienced speaker on Emergency Preparedness topics and also has created a great “Preparedness Party” platform which makes the learning of such a topic more enjoyable for all.
Friday, February 13, 2009
The Magic Number 12
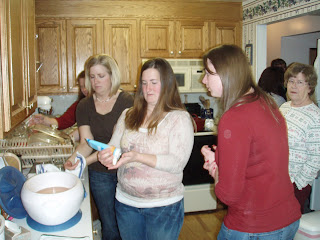 Friday before last I decided to throw a party at my home. I wanted it to be an enjoyable night for the girlfriends in my life, so I threw in some paraffin hand treatments and made tons of food from my food storage supplies. We had 3 main dishes, 2 side dishes, an appetizer and 2 desserts. Would you believe, the food disappeared rapidly with countless requests for recipes?
After everyone had enjoyed their fill of yummy food – yes, I did say “yummy” and yes, it was all made from what I had on hand – we then all sat down and discussed the 9 key areas of emergency preparedness. So many additional ideas and insights were added to my own and we all benefited substantially. So in addition to sharing the recipes with all of my blog readers, I’m also going to break down various components that were discussed for practical application in your emergency preparedness activities. So here’s a great tip followed by a recipe of ingredients from your food storage:
The Magic Number 12
 This is a great tip for novices and pros alike when it comes to accumulating your food storage. As I’ve shared previously, it’s important to “store what you eat and know how to prepare what you store.” This particular tip addresses an effective way to store what you eat.
The other day I was reading a cookbook — I do that frequently — and I happened upon a recipe that I realized I could adapt to make from cans, jars, and food storage items. So I purchased the items from the grocery, tested the recipe out on my hubby, and discovered we had a new yummy recipe that he would eat for a nice dinner, let alone in an emergency situation (He assures me that he won’t be as picky of an eater in an emergency as he is now…but I’m not planning on counting on that promise). So I watched the coupons and ads for the local grocery stores and then went out and purchased enough ingredients to make that dish 12 times. Why?
The objective is to store a year’s supply of food storage, right? I’m also sensitive to avoiding “appetite fatigue” and ensuring that my husband actually enjoys the meals I create. In an emergency, it’s not likely that you will be cooking 3 meals a day, rather one meal of substance, and the rest would be meals of convenience such as instant oats, cold cereal, peanut butter and jelly, canned chicken on crackers, etc. As long as you have a plan for one main meal every day, then you’ll be far ahead. To recap, if you have 30 different meals in your repertoire each month, then you are likely to not meet any appetite fatigue issues or stress because you’re attempting to introduce something new to your family when they are already under a great deal of stress as the result of an emergency.
This is why I purchase my grocery items in increments of twelve. If 12 is too much to handle due to space or financial restraints, then take it down to 6 or 4 or 3. But if you get yourself in the habit of buying this way when you have a recipe that works for you and your family, you will have your year’s supply of meals in a short period of time. Now that’s what I call “eating the elephant one bite at a time.”
Here’s one of the recipe’s which I created for this event. It’s just an open, dump, stir, and warm kind of recipe. Thus not only does it use a minimal amount of your physical energy, it will require a minimal amount of precious fuel as well to warm up.
Southern Chicken and Wild Rice Casserole
4 cups of canned chicken, drained
1 package (6 ounces) of Uncle Ben’s Long Grain and Wild Rice Original Recipe
1 can of cream of celery soup
2/3 cup of Miracle Whip (don’t substitute any different mayonnaise)
1 can (8 oz) of diced water chestnuts, drained (I like to chop mine a bit smaller than they come in the “diced” can)
1 2 oz. jar of sliced pimento peppers. (diced is fine also)
1 regular sized can of French cut green beans, drained
1 ½ cups of chicken broth OR water
2 Tablespoons of pre-grated Parmesan cheese (the stuff in the green can is just fine.)
 Combine all of the ingredients in a mixing bowl and mix well with a spoon. Transfer to a Dutch oven, or a pre-greased baking dish if you’re cooking in a solar oven. Top the dish with the Parmesan Cheese. If using a solar oven, be sure to cover the dish with foil. If using the Dutch Oven, simply put on the lid.
Bake at 400 degrees for 25 to 30 minutes until it’s bubbling and the rice has cooked. Let cool about 5 minutes and then serve.
You can also cook this most expeditiously and economically in a pressure cooker. Simply bring the cooker to full pressure with the ingredients mixed together inside, then once it’s come to full pressure, remove from heat, wrap in towels and continue to cook for about 15 minutes.
Enjoy! Let me know what you think!
Copyright 2009 Kellene Bishop. All rights reserved. You are welcome to repost this information so long as it is credited to Kellene Bishop.
Preparedness Pro Note: If you would like Kellene Bishop to present an Emergency Preparedness message for your community or church group, please contact us at 801-788-4133. Ms. Bishop is an experienced speaker on Emergency Preparedness topics and also has created a great “Preparedness Party” platform which makes the learning of such a topic more enjoyable for all.
Wednesday, January 14, 2009
Will Your Wheat Storage Kill You? Exploring the utilization of wheat in your food storage
When most people think about eating from their food storage, they think about mundane wheat, rice, and beans. If I had to live on that, I may very well starve to death out of boredom, also known as “appetite fatigue.” There are two key ways to avoid this from happening to you and your family if you’re forced to live off of food storage.
1) Store what you eat
2) Learn to use what you store
While this may sound simple, I find that frequently when I evaluate a person’s food storage they are storing items which they have no idea how to convert into an edible food and in some cases they are even storing items which they are allergic to!
 Here are the facts. If you attempt to go from what you’re eating every day now to surviving off of whole wheat, you will be dead within 3 months from the shock of what the wheat will do to your digestive system. If you intend to use wheat in an emergency, you better begin acclimating your body to wheat right now. (It’s the only reason why I learned to make bread, but boy are my husband and father-in-law glad I did. They love my bread!)
So introducing wheat into your diet on a daily basis now is one way to avoid shocking your system literally to death. And it’s part of the fundamental of “learning to use what you store.” I’ve had one woman show me her ample supplies to make some wonderful sounding dishes, but she’s never attempted to make them for herself or her family. That’s a catastrophe waiting to happen.
Remember, the time for preparation is over when the opportunity (or disaster) appears.
Another way to prevent a system shock when you’re forced to convert your lifestyle as the result of an emergency is to store items such as Kamut, Amarath, Quinoa, Millet, and Spelt. These types of grains mixed in generously with wheat will prevent the negative effects of shocking your body with straight wheat. Oh, and by the way, be sure you learn how to eat these items as well. (Yes, you can sprout them also).
Given the choices though, I prefer to introduce wheat into my body regularly. The reason being is that the other grain choices above are 4 to 10 times more expensive than wheat. And that’s saying a lot considering how much wheat has gone up in pricing over the last 2 years.
Learning to use what you store also requires a level of awareness. As you use recipes in your regular meal making activities, ask yourself if you have the items necessary to create such a meal with what you’ve got in storage (This includes what you may need to actually cook the meal with such as a Dutch Oven, Solar Oven, alternatively fueled stoves, etc. I frequently use my Joy Cook stoves for testing emergency preparedness recipes. They are made in Korea and I always see them being sold at sporting goods stores as well as trade shows for camping, boating and guns).
I also specifically look for recipes in which I can adapt the items easily, or already stock in my food storage. For example, today I played around with using peanut butter, ginger vinaigrette and fettuccine. It turned out nicely. But then again I like Thai flavored types of food as well. My husband on the other hand… not so much. Back to the drawing board for me on that one, I guess.
Here is the recipe for you to test out on your finicky eaters:
Ginger Peanut Fettuccine
1 box of (8 oz.) of fettuccine
½ cup of peanut butter (crunchy is ideal for this recipe)
¾ cup of ginger vinaigrette dressing
1 tablespoon of minced garlic. (I buy mine by the large jar and use it all year round)
Reserve 1 ¼ cup of the pasta water
Cook fettuccine according to box directions. Drain completely, setting aside the reserved pasta water. Set aside your pasta while you make the sauce. Returning your pan to the hot surface, simply add your garlic, dressing, peanut butter and pasta water, stirring until smooth. Add cooked pasta. Stir well until mixed.
Makes four servings which include necessary fats, proteins, and carbohydrates. I like to sprinkle a bit of dried parsley over each serving as well.
Enjoy!
I’ll address more of the fundamental of “storing what you eat” in future blogs.
Kellene
Copyright 2009 Kellene Bishop. All rights reserved. You are welcome to repost this information so long as it is credited to Kellene Bishop.
Preparedness Pro Note: If you would like Kellene Bishop to present an Emergency Preparedness message for your community or church group, please contact us at 801-788-4133. Ms. Bishop is an experienced speaker on Emergency Preparedness topics and also has created a great “Preparedness Party” platform which makes the learning of such a topic more enjoyable for all.
1) Store what you eat
2) Learn to use what you store
While this may sound simple, I find that frequently when I evaluate a person’s food storage they are storing items which they have no idea how to convert into an edible food and in some cases they are even storing items which they are allergic to!
 Here are the facts. If you attempt to go from what you’re eating every day now to surviving off of whole wheat, you will be dead within 3 months from the shock of what the wheat will do to your digestive system. If you intend to use wheat in an emergency, you better begin acclimating your body to wheat right now. (It’s the only reason why I learned to make bread, but boy are my husband and father-in-law glad I did. They love my bread!)
So introducing wheat into your diet on a daily basis now is one way to avoid shocking your system literally to death. And it’s part of the fundamental of “learning to use what you store.” I’ve had one woman show me her ample supplies to make some wonderful sounding dishes, but she’s never attempted to make them for herself or her family. That’s a catastrophe waiting to happen.
Remember, the time for preparation is over when the opportunity (or disaster) appears.
Another way to prevent a system shock when you’re forced to convert your lifestyle as the result of an emergency is to store items such as Kamut, Amarath, Quinoa, Millet, and Spelt. These types of grains mixed in generously with wheat will prevent the negative effects of shocking your body with straight wheat. Oh, and by the way, be sure you learn how to eat these items as well. (Yes, you can sprout them also).
Given the choices though, I prefer to introduce wheat into my body regularly. The reason being is that the other grain choices above are 4 to 10 times more expensive than wheat. And that’s saying a lot considering how much wheat has gone up in pricing over the last 2 years.
Learning to use what you store also requires a level of awareness. As you use recipes in your regular meal making activities, ask yourself if you have the items necessary to create such a meal with what you’ve got in storage (This includes what you may need to actually cook the meal with such as a Dutch Oven, Solar Oven, alternatively fueled stoves, etc. I frequently use my Joy Cook stoves for testing emergency preparedness recipes. They are made in Korea and I always see them being sold at sporting goods stores as well as trade shows for camping, boating and guns).
I also specifically look for recipes in which I can adapt the items easily, or already stock in my food storage. For example, today I played around with using peanut butter, ginger vinaigrette and fettuccine. It turned out nicely. But then again I like Thai flavored types of food as well. My husband on the other hand… not so much. Back to the drawing board for me on that one, I guess.
Here is the recipe for you to test out on your finicky eaters:
Ginger Peanut Fettuccine
1 box of (8 oz.) of fettuccine
½ cup of peanut butter (crunchy is ideal for this recipe)
¾ cup of ginger vinaigrette dressing
1 tablespoon of minced garlic. (I buy mine by the large jar and use it all year round)
Reserve 1 ¼ cup of the pasta water
Cook fettuccine according to box directions. Drain completely, setting aside the reserved pasta water. Set aside your pasta while you make the sauce. Returning your pan to the hot surface, simply add your garlic, dressing, peanut butter and pasta water, stirring until smooth. Add cooked pasta. Stir well until mixed.
Makes four servings which include necessary fats, proteins, and carbohydrates. I like to sprinkle a bit of dried parsley over each serving as well.
Enjoy!
I’ll address more of the fundamental of “storing what you eat” in future blogs.
Kellene
Copyright 2009 Kellene Bishop. All rights reserved. You are welcome to repost this information so long as it is credited to Kellene Bishop.
Preparedness Pro Note: If you would like Kellene Bishop to present an Emergency Preparedness message for your community or church group, please contact us at 801-788-4133. Ms. Bishop is an experienced speaker on Emergency Preparedness topics and also has created a great “Preparedness Party” platform which makes the learning of such a topic more enjoyable for all.
Subscribe to:
Posts (Atom)

 Posts
Posts


