Showing posts with label Kellene Bishop. Show all posts

Thursday, April 30, 2009

Emergency Water Sense

By Kellene Bishop

Get the most from your water in an emergency by observing the following tips:
  1. A Vegetable Water Bin: When you open a can of vegetables, (peas, corn, etc), instead of draining the liquid and throwing it out, drain it into a large bin, covered with a lid. Drain all of your vegetables in the same bin. Then when you make a soup, rice, or pasta, you can use this water to cook with instead of having to use fresh water. The same holds true for any water that you use to cook vegetables in on the stove. Suppose you use just a tad bit of water to steam your cabbage in, for example. Rather than discarding the water, put it in your vegetable water bin instead.
  2. Save Your Canned Syrups: The same goes for canned fruits, however, the water in these cans tends to be thicker, and certainly sweeter. You can use this “syrup water” to sweeten grain dishes for breakfast such as oatmeal, cracked wheat, etc. It’s also a great substitute for water in many baked good recipes. You can also use this liquid to make a “sweet milk” with your powdered milk and have a very pleasant taste. It’s yet one more way to ensure your children get their nutrients from powdered milk.
  3. Re-Use Your Bath Water: In the “olden days” it was not uncommon for multiple family members to reuse bath water. While a bit of hot water may need to be added, a couple of baths does not constitute needing to throw it out. You can reuse your bath water to wash laundry in. If you use biodegradable bath soap, then you can also use your bath water to water your garden with as well.
  4. Washing Dishes to the Two-Step: When you wash your dishes, have two bins of water, one for washing, and one for rinsing. When you need to dispose of your wash water, then use your previous rinse water to wash in. Yes, you will need to add some more hot water, but it’s obviously a lot less than starting with a new bin of water. Also, the biodegradable soap is a good idea in this case as well. (As stated previously, I highly recommend using the Shaklee products in this case as they take up much less of your storage space, have multiple uses, and are complete environmentally friendly. For more info go to www.shaklee.net/earlene)
  5. Use Paper Goods When Possible: Instead of using dishes for everything, be sure you have paper goods on hand so that you can conserve the amount of water needed for cleaning. The paper goods also serve as good kindling when you’re making a fire to cook with.
  6. Catch Rain Water: Unless you live in Colorado which forbids its citizens from catching rain water, you should indeed set yourself up to do so. Simply place an open bucket (I recommend a 55 gallon one) at the base of your roof’s run off. You will be shocked at just how fast you can fill up a 55 gallon container with just a couple of mild rain storms. This water can be used for drinking once it’s pasteurized, and it certainly can be used for watering your garden, cleaning, bathing, etc. Don’t overlook what the good Lord can provide you. Capture it.
  7. Catch Bath Water: My husband and I have procured a “solar shower” so that we can enjoy a shower in times of “roughing it” rather than using a tub. However, we’ve also purchased a large, shallow, plastic bin about the size of a mini-shower floor. We’ve done so in an effort to capture even the shower water in order to be able to reuse it.
  8. Alternative Bathing Method: I lived on a very rustic farm periodically as a kid. We didn’t have the luxury of a bath tub or a shower. Instead, when we needed to bath, we simply filled up a plastic bin with hot water. We then used a washcloth and soap to clean ourselves up. Nothing fancy. But it works just fine, and is a valuable approach to bathing when water is a scarce commodity. We grew up calling this a “spit bath.”
  9. Save Your Pasta Water: In addition to having a veggie water bin, and a fruit water bin, I would indeed recommend having a pasta water bin to store the water in which you cook your pasta, rice, and other starches in. This water is ideal for thickening sauces, soups, and casseroles.
  10. Avoid Running Water Actions: Most brush their teeth with running water. You’ll have to get over that habit real quick in a time of emergency. Out of necessity while living in the Philippines, I discovered, lo and behold, that I didn’t need to wet my toothbrush prior to brushing my teeth. And I can simply use a cup of water to rinse my mouth and my toothbrush with. The same holds true for hand washing. If you wash your hands first in a more communal bin for the tough stuff and then just rinse them off with fresh water, you’ll conserve a lot of water.

Overall, before discarding a liquid, ask yourself what else you can possible use the water for? As you may recall, it is recommended that you store 1 gallon, per person, per day for whatever time period you’re preparing for. (I plan on a year.) This gallon of water is intended for drinking, cooking, bathing, and cleaning. However, is it a MINIMUM recommended amount. Putting these conservations tips into practice will help you stretch that gallon to its maximum capacity.

Copyright 2009 Kellene Bishop. All rights reserved.
You are welcome to repost this information so long as it is credited to Kellene Bishop.

Tuesday, April 28, 2009

3 Reasons to Pay Attention to the Swine Flu

By Kellene Bishop

Is the Swine flu just something on the news, or should you actually be concerned about it from a preparation standpoint? The answer is yes, you should indeed be concerned about the Swine Flu—here are three important reasons why.

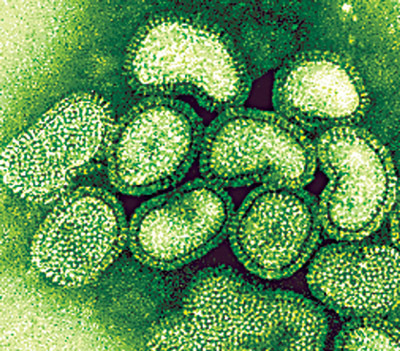
First of all, understand the virus itself and you will understand why informed concern is appropriate in this case. It is a mutation which has components of the Avian flu, the regular flu, and Swine flu. Avian flu is dangerous only in that it is transported from birds to people. It cannot be transferred from people to people. However, this strain of the Swine Flu can. So, if it continues to mutate, you can have a virus strain that not only transfers from person to person, but also from birds to people. As you know, birds have very little borders. They are able to spread their disease via the dust and any other airborne particles easily. Because this virus has already demonstrated a successful mutation of 3 different strains, it shows that it will clearly continue to do so. A mutated virus makes creating antigens in your body very difficult. And if YOU can’t even create the antigens, then a scientist cannot do so either. Additionally, this particular strain of flu is very different. Instead of simply attaching to cells in our body, it is actually able to penetrate the cell wall, thus making exposure to antigens much more challenging. This particular strain of influenza, because it is compromised of H1N1 (Swine) and H5N1 (Avian) makes it an extremely penetrable and deadly virus which is rapidly adaptable and virulent. These two strains combined produce a killing potential at a cellular level.

Another reason to be concerned is that the confirmed cases of Swine flu that we have been told by the media to date have been done so through the very limited availability of test kits from the CDC (Center for Disease Control). Understand that only the CDC can “confirm” a case of this type of virus. And the CDC only this week began sending out test kits to parts of the U.S. and to other parts of the world as well. We already have cases which have spread to New Zealand, Scotland, Brazil, Australia, and Canada. What all of this means is that we haven’t even begun to see the real numbers of people affected this flu epidemic. Keep in mind that viruses in general are not living organisms, rather they are protein structures whose only goal is to replicate themselves.

The third reason why we should indeed be concerned is because even if this isn’t “the big one” it is certainly an incident which should wake us from our slumber of apathy. There is much to be learned from this outbreak that can literally save our lives. Looking at this outbreak and analyzing how we can better be prepared in the event that a pandemic affects our country and even the world, is the best way to prepare. However, having said that, I would prefer that you not underestimate the efficacy of this particular outbreak. To do so would be sugarcoating a situation with strychnine. Let’s not forget that facts thus far here. Schools are being shut down. DHS is taking action to be prepared for a possible pandemic. (Compare this to the fact that FEMA can’t even take action until after a serious crisis has occurred—this should tell you something.) The World Health Organization is NOT closing the borders because they state that such an act would be futile since the virus is already established widespread. (Remember what I said about not even having the real numbers yet?) One case of the Swine flu on a plane headed to JFK, La Guardia, Salt Lake City, Los Angeles, the San Francisco international airport and you can easily have a pandemic. (Come on. Think about it. You know how incredibly dirty the air on the airplanes are. Do you actually think that the air filtration systems on board will filter out this virus from traveling from one host to another?) Keep in mind that individuals who are carrying the virus may simply be a host. They may carry it to others without necessarily manifesting symptoms of it themselves. So you may assume that you are interacting with a perfectly healthy person, but still contract the virus strain.

I’m not being a fear monger here. As someone who tends to get emotionally involved in the well-being of others, I’m trying to get you to be fully aware of how fast this or other strains like it can spread. It will be incredibly difficult for me to see so many that I know and love exposed to such an illness such as the swine flu. So, given that I do believe you have need to be cautious in this situation and most definitely to learn from it, allow me to share with you how your behavior must change in the event of a full-spread outbreak. Review the following steps so that you can truly be prepared for such an event:

1) Always use a breathing mask outside of your home.
2) Wash your hands constantly and do not remove or put on your breathing mask without having just washed your hands
3) Keep your hands away from your eyes and mouth under all circumstances. (Use a fork even to eat your French fries with.)
4) Do not eat any food which you have not personally prepared
5) Regularly ingest immune system building vitamins and herbs so that you can create a true, non-chemical immunity. Don’t wait until symptoms appear. While viruses tend to mutate and get stronger under chemical attacks, they respond completely differently to non-chemical, strong environments. This is the very kind of culture you can create in your body if you start partaking now of quality herbs, vitamins, and minerals. I STRONGLY suggest that you ingest sublingual (taken under the tongue) or colloidal versions of your nutrition supplements as such methods are actually able to permeate the cells. Taking pills does not have this effect on your body and thus is useless to attacking a strain such as this that burrows into your cell.
I highly recommend you use a colloidal version of minerals. Bacteria simply cannot grow in a mineral environment. (By the way, colloidal silver is another good remedy to have on hand for fighting a myriad of illnesses as well—see my other suggestions in yesterday’s article.)
6) Be sure you wash ALL of your vegetables (even the ones with skins) and meats very well prior to storing or cooking them. Also be sure to wipe off your cans of food prior to opening them. When you do follow these steps also be sure that you keep your hands washed afterwards as well. Here’s a natural wash for your meats and vegetables that you can make yourself.
· 1/4 cup Vinegar
· 2 Tablespoons salt
Fill a clean sink with cold water, (a plastic dish pan also works wonders) add vinegar and salt and let sit 15 minutes, rinse. (The vinegar cleans the fruits and vegetables, while the salt draws out any maggots and such, dirt and other undesirable components. This wash does not adversely affect the flavor at all and vinegar helps take care of the sprays and wax they tend to use.
7) Use a germicide (not a sanitizer) on high-traffic areas in your home such as door and cabinet knobs, telephones, and table edges. I highly recommend the one that Shaklee makes. It’s 100% biodegradable, concentrated, affordable, and incredibly EFFECTIVE. (No, I don’t sell it, but recommend you go here to obtain some www.shaklee.net/earlene)
8) Use Latex gloves when handling items from outside of your home or when assisting other individuals (whether they manifest symptoms or not) outside of your home.
9) Eliminate contact with other people outside of your home as much as is truly possible.
10)Don’t leave your home unless you absolutely have to. In such an instance, be sure that you are adorned with a breathing mask and have latex gloves. (If this particular strain were able to mutate into a flu strain that cannot only be transferred from person to person, but also from birds to person, then it’s critical that you leave your home only at night, not during the day as birds typically only fly during the day light hours.)

I hope this piece gives you further insight into your own preparedness efforts. And I truly wish you well in your goals of becoming more prepared.

Preparedness Pro Note: If you would like Kellene Bishop to present an Emergency Preparedness message for your community or church group, please contact us at 801-788-4133. Ms. Bishop is an experienced speaker on Emergency Preparedness topics and also has created a great “Preparedness Party” platform which makes the learning of such a topic more enjoyable for all.

Copyright 2009 Kellene Bishop. All rights reserved.
You are welcome to repost this information so long as it is credited to Kellene Bishop.

Monday, April 27, 2009

How Can You Be Prepared For The Swine Flu?

By Kellene Bishop, Preparedness Pro

Photo by AP Photo/Miguel Tovar

Being prepared independently to handle such a crisis as a Swine flu epidemic is critical. Believing that life will always be “normal enough” for you to plan on having access to the “anti-virus” or vaccination shortly after the time of exposure is truly a gamble of Russian roulette proportions.

Hopefully the news as of late regarding the spread of Swine flu has you concerned to some degree of your own exposure. Or perhaps the news has at least made you aware that your emergency preparedness supplies aren’t presently sufficient for such a crisis. If you’re becoming aware of such a situation, that’s actually the best thing that can result from the news of this epidemic. Because the good news is that you can be prepared for this and other like ailments by taking some proactive steps now.

First let’s look at some supplies that you will want to have on hand for external physical benefits.
1) Breathing mask: A great deal of flu diseases are spread airborne. As such, being sure to protect your nose and your mouth from inhaling the disease or even from spreading it should you have been exposed to it is critical. Breathing masks are much like what you see on the doctors or nurses faces during a surgery. They do not have to be a heavy plastic. (In fact, if you do end up having to wear them for an extended period of time, you’ll wish that they aren’t heavy.) Instead, you can purchase lightweight version at your bulk wholesale stores. You will need to anticipate needed one per person in your home for each day that you may have to ride out an epidemic.

2) Hand Sanitizer: While washing your hands with hot soap and water frequently is preferable, it’s not realistic should you have to endure a bio-crisis such as this. So be sure that you have a quality hand sanitizer on hand. Again, you want to be sure that you do not underestimate the quantity of this item to have readily accessible. Not only will it prove useful for spreading a disease, but it’s ideal for everyday use as you ride out any other type of emergency which requires you to live off of your supplies.

3) Homeopathic Remedies: It’s important that you familiarize yourself with herbal or other types of remedies that can assist individuals who are exposed to something like the Swine flu. The more universal the remedy is, the better so that you don’t have to become a “pharmacy” of remedies. Storage space is valuable, right? I’ve researched a great deal of remedies and my first advice to you is to partake of something regularly now which truly strengthens your immune system. Use a quality nutrition supplement now in order to ensure your health later when such a disaster may affect you. I strongly recommend products such as Reliv or Essiac tea to be made a part of your daily regime now as if you wait until you’re exposed to an airborne illness such as the Swine flu to imbibe, your symptoms will be drawn out, and your body will also have to struggle with the introduction to healthy materials in addition to fighting the flu. To clarify, when you ingest a product which is effective in fighting such a virus, and strengthening your immune system, there will inevitably be some “cleansing” of your body. Cleansing toxins from your body can actually stir things up and make you a bit ill initially. So it’s important that you focus on your health now, so that if you have to step up your natural remedies, the cure doesn’t harm you, so to speak.

In addition to these remedies to begin ingesting now, (you can also use them for crisis remedies as well) here is a list of other alternative remedies you may want to have on hand:

Zinc Lozenges
Echinacea
Goldenseal
Oil of Oregano (a dose of two drops tastes nasty, but it will kill most any virus.)
Oscillococcinum
Gelsemium
Bryonia
Rhus Tox

4) Knowledge: Yes, it’s true. You don’t want to bet your life on the utilizations of methods that you aren’t familiar with. So obtaining the knowledge you need to properly use such alternative methods is critical. The good news is that finding the right homeopathic medicine for the flu is actually relatively straightforward because the symptoms are easy to identify and universally evident in most flu strains. (Fever, body aches, sore throat, cough, runny nose, vomiting, diarrhea, and lethargy.) Additionally, you can take comfort in the fact that homeopaths have treated viral illnesses, including the flu as early as the 1918 flu pandemic. A report from the American Institute of Homeopathy in 1921 documented the dramatic success of homeopathy in the worst flu pandemic in history. The death rate of 24,000 flu cases under conventional medical care in that study was 28.2 percent, while the death rate of 26,000 cases treated with homeopathy was a nearly miraculous 1.05 percent. Similarly, many homeopathic physicians each reported treating thousands of patients with very few deaths. So get armed with the necessary knowledge, and you will truly be prepared.

Copyright 2009 Kellene Bishop. All rights reserved.
You are welcome to repost this information so long as it is credited to Kellene Bishop.


Preparedness Pro Note: If you would like Kellene Bishop to present an Emergency Preparedness message for your community or church group, please contact us at 801-788-4133. Ms. Bishop is an experienced speaker on Emergency Preparedness topics and also has created a great “Preparedness Party” platform which makes the learning of such a topic more enjoyable for all.

Wednesday, April 22, 2009

Rice in Your Food Storage


By Kellene Bishop

If you’re smart, you’ll store 400 pounds of rice per adult person in order to have a year’s supply. Understand that rice has a life-saving value to it in and of itself as it is the staple food of over a third of our entire world. I’ve lived in and seen many communities in which it was their ONLY food source. White rice typically stores for 10 years. Fortunately it doesn’t require that you store it in a cool, dry place, as the majority of our world which rely on rice live in hot and humid environment. As such, rice is hearty to store. Brown rice has a better nutritional benefit to it, but you can live off of rice with a few other items just fine. Since you’ll get sick of “rice and beans,” Mexican flavored rice, or fried rice after awhile it’s no surprise that I’ve had several requests asking what else can be done with rice other than “the norm”. Today I’m providing some other options for you.

In addition to ingesting, “rice water” has been used elsewhere in the world to calm inflammations on the body. Rice strengthens the spleen and aids in curing digestive problems.

Rice starch is used in making ice cream, custard powder, puddings, gel, and distillation of potable alcohol, etc.

Rice can be ground into a flour and used as a substitute flour in flat breads, noodles, cereals, baby food, and more. You can also slow “roast” rice to the point that it “puffs” and eat it just like you would a bowl of Rice Krispies. You can also use rice to feed poultry.

There are also some great uses for “leftover” rice as well, including the Congee recipe I’ve included below. You can make a simple salad by adding some olive oil, a can of artichoke hearts, nuts, Dijon mustard, and some flavored wine vinegar. If you simmer it for a long time and add cinnamon, coconut milk, and brown sugar, it’s one of my favorite desserts!

You can also make “rice coffee” simply by roasting a cup of it in a frying pan until it’s brown, then putting it in a kettle with about 6 cups of water until boiling. Add your favorite sweetener, and voila—you have a caffeine-free alternative to regular coffee.

For breakfast, I frequently ate “Champrado” in the Philippines. It was my favorite breakfast and so simple to make from leftover rice. By the way, left over rice doesn’t really have to be refrigerated. We always kept it on our kitchen counter overnight until we used it the next morning. For Champrado, all you have to do is boil the cooked rice in water (like a porridge as you see in the Congee recipe below) then simply add some sugar, cocoa powder and serve with some evaporated milk. Even the kids will LOVE this.

Start experimenting now so that you’re not “lost in the woods” later on. Here’s some great rice recipes to try. Enjoy!

Chicken in the Weeds


Mix the following ingredients in a bowl and set aside.
1 Can of cream chicken soup
1 cup of mayonnaise
2 T. lemon juice
1 T. curry
Salt and pepper to taste

In a 9 x 13 casserole dish layer the following beginning with the rice.
4 cups of cooked rice
2 12.5 ounce cans of chicken (drained)
1 cup of sprouts (wheat sprouts is great) If you’re making this for normal, everyday eating, use 2 cups of frozen broccoli
1 cup of grated cheddar cheese
½ cup of bread crumbs (seasoned or not…it’s up to you)

Cook at 350 degrees for 30 minutes.

CONGEE (This was one of my favorite dishes in the Philippines!)

1 cup of cooked rice (leftover is fine) OR ½ cup of uncooked rice
4 cups of water
1 12.5 ounce can of chicken (drained)
A pinch of garlic
1 T. of ground ginger (Fresh is ideal. You can freeze ginger root and use it for a long time. It grates easier that way as well. You can also buy ginger in a squeeze tube, or you can always use the dried ground kind.)

Bring to a boil in a medium-sized sauce pan. Then reduce heat and let simmer at medium temp. for ½ hour, stir occasionally. (For uncooked rice, simmer for 1 hour) The key here is that you’re cooking this for so long that it breaks down into a somewhat thick consistency. It will no longer resemble just “rice and water.”

Season with appropriate spices such as green onions, a little soy sauce, ground black pepper, and Chinese Five Spice—super yummy!

Dish in a bowl and enjoy.
Copyright 2009 Kellene Bishop. All rights reserved. You are welcome to repost this information so long as it is credited to Kellene Bishop.
Preparedness Pro Note: If you would like Kellene Bishop to present an Emergency Preparedness message for your community or church group, please contact us at 801-788-4133. Ms. Bishop is an experienced speaker on Emergency Preparedness topics and also has created a great “Preparedness Party” platform which makes the learning of such a topic more enjoyable for all.

Tuesday, April 21, 2009

My Top 7 Handy Dandy Preparedness “Tools”

You may think that my top 7 handy dandy preparedness “tools” are an unusual list for emergency preparedness supplies, but I’m quite certain that you will find them invaluable under the right set of circumstances. I love discovering and using items that serve a dual-purpose, especially when those purposes are compounded substantially. If I have something in storage, chances are it serves more than one purpose. Whether it be medical supplies, seeds, a heater or wood, virtually everything I relegate space to store has multiple uses that I familiarize myself with so I get the most use out of my space. Without further ado, here is my Seven Handy Dandy “Tool” list.

1) Duct Tape: We have an entire case of duct tape in our basement. You can use it medically as well as to fix leaking or broken items. It’s even viable to use to mend clothing or shoe, too. It’s also affectionately called the “100 mile per hour tape.” When I was in my early 20’s I was in a car accident and “needed” the insurance money to live off of. Consequently, I used duct tape to reattach the bumper and away I rode… for another year and a half until I bought a new car. While I never went 100 miles per hour—not that I’m willing to admit, anyway—it worked just fine in keeping my car together.
2) Super Glue: Yet another case of supplies occupying our storage area. This can also be used in lieu of minor stitches as well as prolonging the life of items that may break down. In an emergency, you may very well have to rely on yourself for such instances as opposed to a professional “fix-it man” or medical personnel.
3) Bounce Dryer Sheets: Ah hah. I knew I’d get raised eyebrows on that one. Here’s just a few ways that your dryer sheets will be useful to you. They repel insects, including yellow jackets, bees, ants, and mosquitoes. All you have to do is loop it through a belt loop, and voila, you are a walking citronella candle. They also repel mice. Simply lay them down around an area that you are trying to protect, and you’ve scared little Mickey away. You can also use them to dissolve soap scum (just wet and scrub), prevent sewing thread from tangling (rub on a strip of thread prior to use) and removing baked-on foods from kitchen items (simply soak with a sheet in it and it comes off). Not to mention the everyday uses it provides you with such as cleaning blinds, eliminating static from your computer and TV screens, deodorizing shoes, books, and photo albums. It will truly serve as a duplicitous ally when you’re “roughing it.”
4) Tarp, Tarp, and More Tarp: We buy the blue tarps from Costco and have a small stack of them in the basement. They are sturdy, water proof, and priced much better than even one good quality tarp elsewhere. In the event of nuclear fall out, roof damage, window damage, freezing temperatures, and a myriad of other instances, I find that this is one product that makes sense to have on hand. In fact, even if my tents were to fail to provide me with shelter, I can always combine the tarps with my duct tape supply and have suitable protection from the elements. *wink*
5) Foil: In addition to the regular, everyday uses of foil, you can also use it for emergency signaling, cooking and insulating. You can even put water in a well made foil and duct tape “pan,” let it sit in the sun during a warm day and have distilled water at the end of the day.
6) Lemon Juice: We’ve got a great supply list for this, too. Lemon juice is great as a:
a. Deodorizer
b. Sanitizer
c. Antiseptic
d. Disinfectant (even for medical uses)
e. Dandruff treatment (add 1 T. prior to shampooing, then 2 T. diluted with water after rinsing)
f. Laxative—without the usual side-effects
g. Relief for a sore throat or hacking cough
h. Itch and pain reliever from poison ivy
i. Yummy flavoring
j. Blemish treatment (when mixed with honey)
k. Substitute for buttermilk (mix 1 T. with 1 cup of milk)
l. Tarnish remover
m. Bleach substitute in laundry.
I could share more with you, but since I’m certain I’m listed as a “right wing extremist”, I won’t egg anyone on talking about the self-defense measures that can be realized with lemon juice as well *wink*
7) Salt: You’ve heard biblically of salt being a critical component. Perhaps after seeing all of these uses you’ll understand why I always take advantage of sales on simple table salt. In addition to all of the ways salt can be used, it’s also a necessary nutrient that many underestimate. Salt can also help:
a. Prevent lettuce from wilting
b. Repel ants
c. Prevent food from sticking to your griddle (just rub it in)
d. As a wood preservative (boil your clothespins in them and they will last a LOT longer)
e. A boiling water accelerator (faster boiling means using less fuel)
f. Remove mildew (when used with lemon juice)
g. Remove stains (even works on grape juice in your carpet—but hey, who’s going to really care about the carpet in an emergency, right?)
h. Kill weeds
i. Prevent your laundry from freezing when you hang them out to dry in cold weather
j. Make your milk last longer with a dash of salt
k. As a plaster substitute (when mixed equally with starch)
l. Substitute for toothpaste (with equal parts of baking soda)
m. Relieve sore eyes (when rinsed with salt water)
A pinch of salt also improves the flavor of a lot of items that may taste stale otherwise such as cocoa, gelatin (it sets more quickly as well), fruits (when putting them in also water—this also prevents them from turning yellow), tea, cooking apples and warm milk (makes it more relaxing as well). Also, egg whites and whipping cream whip up faster with a pinch. And last but not least, when you soak your shelled nuts in salt water overnight, all you have to do is gently tap the edge gently and they will easily come open, providing a whole nut instead of crumbles that you have to hunt to find among the shells!

In addition to all of these items, I would also recommend you Google multiple uses for vinegar, wheat, rope, isopropyl and rubbing alcohol and apricot seeds, among other things. Obviously it doesn’t cost you any money to at least gain this knowledge. And you may end up being a real, live MacGyver in the end.

Copyright 2009 Kellene Bishop. All rights reserved. You are welcome to repost this information so long as it is credited to Kellene Bishop.

Preparedness Pro Note: If you would like Kellene Bishop to present an Emergency Preparedness message for your community or church group, please contact us at 801-788-4133. Ms. Bishop is an experienced speaker on Emergency Preparedness topics and also has created a great “Preparedness Party” platform which makes the learning of such a topic more enjoyable for all.

Thursday, April 16, 2009

Bring on the Sun!

By Kellene Bishop

A new book has been released illustrating with surprisingly reality and extensive details what would happen to America in the event of an EMP attack (Electric Magnetic Pulse). The book is "One Second After" by New York Times best-selling author William R. Forstchen, who talked about the possible impact of such an attack on the Sean Hannity Radio Show today. I’m also quite partial to a book by Pat Frank, “Alas, Babylon” that was wildly popular in the 1950’s which explores a similar situation and the necessary results of human beings having to get back to basics and innovation. For those of you who don’t know, such an attack is very possible and would paralyze our world as we know it. It would cause a financial, social, medical, and technical chaos as you’ve never seen previously. And it would certainly put us all in a true survival mode. Your world without electricity is much more restrictive than you can imagine. But with a little preparedness now, you’ll be just fine. All you have to do is simply learn how to harness the unfailing power of the sun.

Even in the winter, sun powered items will prove to be a boon to your comfort. Additionally, using the sun in as many instances as possible will enable you to conserve your other fuels such as kerosene, wood, and propane for other purposes.

My favorite “toy” is my solar powered oven. It not only cooks things wonderfully, but it can also be used to pasteurize water. (It also bakes bread, cookies, cooks meats, and everything else I can think of just fine and dandy.)

I also love my solar powered battery recharger. I had no idea how much I used batteries until I tried to put myself on a battery buying hiatus and started using my stored up amount. I was so disappointed in how many countless batteries I had in my storage that didn’t work any longer. Rechargeable batteries are clearly the answer, but not when you don’t have any electricity. Duh for me! Now, I’ve invested my money in the rechargeable batteries and a great solar powered battery recharger. You can even find one that will recharge your laptop battery!

Solar powered outdoor lamps are a good idea as well. I believe that they will provide some semblance of security for my home as I ride out the ensuing chaos in the event of an EMP attack or like magnitude.

Obviously there are some significant alterations you can make to your home at present by adding in solar panels for electricity. (It’s safer and more practical than using a gas-powered generator, folks.) With technology like this you don’t necessarily need to go without a hot shower. This doesn’t need to be an expensive, new-fangled kind of solution. For less than $350 you can make your own solar powered generator! (see: http://www.energyrefuge.com/how-to/solar_power_generator.htm)

There are also solar powered lights, radios, and cell-phone chargers. Also a mere 15 minutes of sun daily can provide you with an entire day’s worth of Vitamin D. Now that’s some lifesaving solar power!

There are far too many options on the types of solar products for me to give you a run down of a specific brands and costs. I recommend that you do a search on “solar powered + emergency” on the internet. Just take it one step at a time, but it would indeed be wise to take such steps. And read “Alas, Babylon.” I really think you’ll like it!

Copyright 2009 Kellene Bishop. All rights reserved.
You are welcome to repost this information so long as it is credited to Kellene Bishop.

Preparedness Pro Note: If you would like Kellene Bishop to present an Emergency Preparedness message for your community or church group, please contact us at 801-788-4133. Ms. Bishop is an experienced speaker on Emergency Preparedness topics and also has created a great “Preparedness Party” platform which makes the learning of such a topic more enjoyable for all.

Tuesday, April 14, 2009

Bread! Glorious Bread!

Alright. You keep being told to store wheat right? But I bet that you’re wondering what the heck to do with it. I do address different ways you can use wheat in a previous article, and one of those ways is obviously bread. Let’s face it. Bread making in our homes is a lost art. I forced myself to learn for three reasons.

1) I knew that if there was an emergency which required me to live off of my food storage, I darn well better learn how to make bread out of all of this wheat I was storing.

2) I needed to find some way to introduce hearty wheat into my diet so that I didn’t put my digestive system into shock when I did start living off of it.

3) Even though I could get away with paying only 99 cents for a loaf of bread occasionally, I knew that if I could make it fresh, it would be sooo much better for me and therefore worth it.

As it turns out, my decision to learn how to make bread was a good choice for other reasons as well.

1) My husband LOVES it, as do the neighbors, my employees, and even me! (Plus, it makes for great gifts)

2) I now have the confidence I need to make it and know that we’ll be just fine surviving on it.

3) I now have a more accurate understanding of what OTHER items I need to have on hand in my food storage. (Go figure. You can’t just make wheat bread with just wheat.)

4) My quest for learning how to make it has led me to develop a KICK BUTT-No-Fail recipe! (I never thought I’d be saying that when it came to bread making?!)

So, I’m going to share the recipe with you today. For those of you who are already pros, I dare say that you’ll find some twists that I incorporate that may be helpful to you. And at the very least, you will LOVE the breadsticks idea. For the record, this bread turns out nice and soft even though it’s 100% whole wheat. It’s often been mistaken as “store bought” bread. (When feeding kids that can be a good thing.)

First, let me just share with you—don’t be discouraged by the methods that I use for making my bread just because you may not have them on hand. I have had ALL of my new-fangled luxuries break down at some point and thus have had to make due with good old fashioned elbow grease. I use a Bosch Universal Mixer and a Nutrimill to make this easy bread making. The Bosch does all of my kneading for me, however, I have used my Kitchen Aid mixer instead of my Bosch, but it seemed to be awfully hard on the motor. You’ve got to have one of the heavy-duty Kitchen Aid mixers if you’re going to make bread in it. Otherwise you’ll have to knead the bread the good old fashioned way—by hand. Also, keep in mind that I’m giving you my recipe based on the use of electricity and such. Obviously, that won’t do you much good if your power is out and you’re camping for a while. Don’t worry. If you begin making bread more regularly “in comfort”, then when it comes time to do it under “less than desirable circumstances” you’ll be able to easily adapt, much better than had you never mastered it.

Kellene’s Kick-Butt Wheat Bread (and her famous breadsticks)

Ingredients:

6 cups of warm water (How do you know it’s warm enough or not too hot? If it’s warm enough to bathe a baby in without scolding it, then it’s just fine.)
2 T. “Real Salt”
3 T. of Lecithin Granules
2/3 C of Vegetable oil
(you can use apple sauce as a substitute)
2/3 C Honey
2 ½ T. of Dough Enhancer (I use the Magic Mill brand which you can usually find in the grocery stores, but definitely locate in your specialty kitchen stores. You can also use lemon juice as a dough enhancer)
12 to 16 C of wheat flour (I grind my own flour for this recipe each time with my Nutrimill—Yes, you can use white flour if you’d like, but you only need to knead the bread about ½ as long)
2 ½ T of Instant Yeast (I use SAF brand and I store the open package in the freezer or the fridge for years)
2 T. Vital Wheat Gluten (Note: ONLY use wheat gluten if your flour is old or a lesser quality wheat. If you’re using fresh ground wheat or a good quality flour, then you won’t need the wheat gluten.)

Place 9 cups of freshly ground flour in the mixing bowl with the dough hook attached. Then add 6 cups of warm water. Mix on speed level 1 until you’ve got a paste consistency. Turn off the machine and add the yeast, salt, honey, oil, and lecithin granules (and wheat gluten if you’re going to use it). Turn machine back on to speed 1. Begin adding additional cups of flour one cup at a time. As the machine bears down, increase the speed to 2. Continue adding additional flour until the dough pulls away from the sides of the bowl. I usually use a total of 15 ½ cups of flour.

Note: Here’s the trick. You want to make sure that you do not add too much flour. I like to add just enough so that the dough starts pulling away and that I can handle the dough. This approach, as well as the lecithin granules and dough enhancer, is the reason why my bread turns out so soft. Most folks who make homemade wheat bread add too much flour.

Set your timer and let the Bosch knead the dough for 7 to 8 minutes. Stop the mixer. Add the dough enhancer. Then let the Bosch knead the dough for another 2 minutes (still on Speed 2). Grease your hands and then gently remove all of the dough from the bowl and place it on a greased cutting board in an even rectangular shape. Using a knife, score your dough into 5 evenly spaced sections. Then pinch off each section, form it into an oblong loaf.

Note: Pinch your bread dough, not tear it. Only score your bread so that you can see the 5 sections. Don’t use the knife to actually cut the sections.

Place the loaf in 4 to 5 greased bread pans or you can use non-stick bread pans, depending on the size of loaves you desire. (I use 5 non-stick bread pans, but I still spray them with “Pam.” They should be about ½ to 2/3 full.)

Place the loaves where they will not be blown on by the air conditioning so that they can rise at room temperature. Cover the pans with Saran Wrap to keep them moist as they rise. (I spray the Saran Wrap with “Pam” on the sides that will be on top of the bread to prevent the dough from sticking to the wrap.) Let the dough rise until doubled. This should be approximately 1 ½ inches above the top of the pan.

When finished rising, place them in a pre-heated 350 degree oven. Bake for 30-40 minutes. When the bread is finished baking, you will be able to tap it lightly on top and have it sound “hollow.” Take the pans out and place them on a cooling rack for about 10 minutes. Then remove the loaves from the pans and cool sufficiently prior to storing.

Special Note: This recipe makes great rolls as well! As a special little trick when I’m hosting a party, I take the dough and roll them into small breadsticks (about 4 -5 inches long). Then I dip the “breadstick dough” into melted butter. Then I place them on a big cookie sheet about an inch apart from each other. I then sprinkle McCormick’s Salad Supreme seasoning generously on top of them and bake them at 350 degrees for 13 to 18 minutes. You will LOVE the taste of these bread sticks!

Copyright 2009 Kellene Bishop. All rights reserved.
You are welcome to repost this information so long as it is credited to Kellene Bishop.

Preparedness Pro Note: If you would like Kellene Bishop to present an Emergency Preparedness message for your community or church group, please contact us at 801-788-4133. Ms. Bishop is an experienced speaker on Emergency Preparedness topics and also has created a great “Preparedness Party” platform which makes the learning of such a topic more enjoyable for all.

Monday, April 13, 2009

The Virtue of Powdered Milk

Ok, I admit it. I used to hate powdered milk as a kid. But I have to admit, it's come a long ways in 30 years, thank goodness. With the cost of milk nowadays, if you've got more than 2 mouths to feed, it can cost as much for milk as it does to fill up your car with gas. And if you're a "dairy freak" like I am, you'll wonder what in the world you'll do in the event of an emergency when you may be FORCED to use powdered milk regularly.

Other than the fact that I always type the word “powdered” incorrectly, I truly do value this storage staple. It will indulge my every dairy craving in a pinch, including buttermilk, cream cheese, sour cream, yogurt, and cottage cheese. Just a little bit of culturing and it turns into whatever dairy product I desire. In fact, I can even combine it with an equal amount of ice water and some flavoring and turn it into a yummy fluffy dessert topping. And it’s great in all of my recipes. It costs half as much as “fresh” milk, has zero cholesterol, zero fat, and is high in calcium, vitamin D and protein. And hey, it even comes in an easy to store box which I can neatly stack on my shelves. I have found no problem using it as a milk substitute in every recipe with just a bit of water added to it. I can also make dry baked mixes or beverage mixes ahead of time with it with no need for anything else but water. Ironically, the only thing I don’t care for powdered milk is as a substitute for just plain milk. However, I have discovered the trick of adding in a ½ teaspoon of vanilla per half gallon of powdered milk mixture to make it taste a lot better. I find that powdered milk tastes just fine when mixed equally with whole milk as well. Plus, I’ve never had kids complain when I mix chocolate syrup or strawberry syrup in it straight.

Powdered milk tastes best if it is mixed up and allowed to chill overnight before serving, or for at least 4 hours. Chilling actually aids in dissolving the powdered milk completely and gives it a fresher flavor.

OK. To use powdered milk for just about anything, you first need to learn to reconstitute it. So let’s start with that.

Reconstituted Powdered Milk:
Take a 2 quart pitcher and fill it just over half with very cold tap water. Then add 2 and 2/3 cup of powdered milk. Using a long whisk, whisk the milk until it appears to be well mixed and the milk appears to be mostly dissolved. Then fill the pitcher to full with additional cold water. It’s best to have a lid on the pitcher and then place it in the refrigerator overnight or at least 4 hours.

To make buttermilk from reconstituted milk, you’re going to need some “starter.” But don’t worry. You can buy the small pints of buttermilk and store them in your freezer until you’re ready to use them.

Cultured Buttermilk: You won’t believe how easy this is! Take 3 and ¾ cups of reconstituted milk and add it to ½ cup of commercial buttermilk. Allow it to sit on the counter overnight (8 to 10 hours at room temperature) and Voila! You’ve got buttermilk! (I store it refrigerated thereafter, just so you know.) I have to have buttermilk to make my all time favorite syrup recipe (Sorry, I’m going to save that for another post).

Here’s another idea that I have loved to use with powdered milk. It’s called “molasses milk.” All you do is warm up about ¾ cup of reconstituted milk and then stir in a regular spoonful of molasses (double and triple accordingly). It’s yummy. It kind of tastes like caramel toffee. And here you thought that molasses was just for cookies.

Hopefully from reading this you’ve thought about the importance of having powdered milk in your supplies, along with molasses, chocolate syrup, and vanilla extract in your storage items. For future reference I would also add that you’ll want lemon juice and cocoa as well.

I look forward to sharing more with you later.

Copyright 2009 Kellene Bishop. All rights reserved.
You are welcome to repost this information so long as it is credited to Kellene Bishop.

Preparedness Pro Note: If you would like Kellene Bishop to present an Emergency Preparedness message for your community or church group, please contact us at 801-788-4133. Ms. Bishop is an experienced speaker on Emergency Preparedness topics and also has created a great “Preparedness Party” platform which makes the learning of such a topic more enjoyable for all.

Tuesday, April 7, 2009

Pressure Cooking Pot Roast

Last Friday I elected to nurture an injury with some real, home cooked food. I was really craving a pot roast, but didn’t want to put the traditional time and energy into it. So what did I do? I talked my assistant through the step-by-step process of making a yummy pot roast in under an hour! And it was so good, my husband finished it off before I had a chance to have seconds (darn it).

So how did I accomplish such a feat? I used my pressure cooker. So in the event that you’re still waffling around about purchasing one, I’m going to share the wealth with you (Just as a reminder, I recommend the Kuhn Rikon brand – aka Duromatic).

1. In your pressure cooker, put two tablespoons of oil. On med-high heat, sear your pot roast (about 2 to 4 pounds) on all sides. Once it’s nicely seared, remove the pot roast from the pressure cooker and add 1 cup of red cooking wine.
2. Scrape the bottom of the pressure cooker with a wooden spoon, being sure to loosen all of the flavorful bits from the bottom.
3. Add the pot roast back to the pressure cooker along with 2 cups of water and one envelope of Lipton Onion Soup mix.
4. Bring the water to a boil, and then cover the pressure cooker. Allow the pressure to come up to high, then turn the heat down sufficient to maintain the high pressure. Cook the pot roast for 20 minutes per pound.
5. Once roast is finished cooking, release the pressure completely.
6. Add 2 heaping cups of potato wedges (because you don’t have to cut them small with a pressure cooker), 2 cups of baby carrots and a couple stalks of chopped celery. Be sure to add the potatoes first to make room for the smaller items, and be sure that you do not fill your pressure cooker more than two-thirds full.
7. Add an additional cup of water.
8. Bring the water to a boil and recover the pressure cooker.
9. Cook at high pressure for 5 minutes.
10. Release the pressure and enjoy a yummy, tender pot roast and perfectly seasoned vegetables!

Again, I wholeheartedly recommend a pressure cooker so that you can preserve your own physical energy, your fuel, and water. It cooks faster and more nutrient rich than any other method available. The new models that have been made as of late are much safer than what you might remember your grandmother using. They really, really are an asset to any kitchen now, or in an emergency.


Copyright 2009 Kellene Bishop. All rights reserved.
You are welcome to repost this information so long as it is credited to Kellene Bishop.

Preparedness Pro Note: If you would like Kellene Bishop to present an Emergency Preparedness message for your community or church group, please contact us at 801-788-4133. Ms. Bishop is an experienced speaker on Emergency Preparedness topics and also has created a great “Preparedness Party” platform which makes the learning of such a topic more enjoyable for all.

Friday, April 3, 2009

EZ Preparedness Recipes

I thought I’d give you a break today from all of the preparedness “thinking.” So today I’m simply providing you with two yummy recipes – Spam Friend Rice and Mexi-Cincy Chili – that you can easily make from what’s in your cupboards right now. Hopefully, knowing that you can make use of what you’ve got on hand (or can at least easily have on hand) will lessen any anxiety you may have in surviving a disruption to your regular way of life.

Be Safe and Be Prepared—Kellene

Spam Fried Rice

This recipe is an ideal use of Spam, the meat that seems to store as long as a Twinkie. And it’s an easy “dump” kind of recipe. Don’t shy away from this recipe just because it has Spam in it. If you don’t tell anyone, I’m certain they will never crinkle their nose to the Spam notion. J

Note: If you elect to make it as a non-food storage meal, you can use 8 to 10 ounces of boneless, diced pork chops and add a couple of stalks of sliced green onions (white and green portion) and use frozen peas instead.

As a food-storage meal, you can also substitute the Spam for canned chicken or canned baby shrimp too, if you prefer.

1 12 oz can of Spam, cut into small square pieces
2 teaspoons of olive oil
1 package (6.2 oz.) of Rice-A-Roni Fried Rice flavor (The store brands work just as well for this recipe)
2 cups of water
1 can of peas- drained
Soy sauce for serving (optional)

Place the oil in a large skillet or Dutch oven. And heat it over medium-high heat. Add the Spam pieces and cook, stirring until the Spam is browned a bit, 2-3 minutes.
Add the Rice-a-Roni including the seasoning contents. Pour in 2 cups of water and stir to loosen the brown bits from the bottom of the pan. Let the mixture come to a boil, then reduce heat to medium-low and cover. Let simmer for 15 minutes.
Add the peas and warm a bit longer, 3-5 minutes. Serve at once with soy sauce as desired.

Fuel conservation note: If you merely heat up the pan enough to bring the water to boiling, you needn’t continue to cook it on your fuel source. You can merely let the dish set for a while (about 30 – 45 minutes) and let it naturally absorb the water. The Spam is safe to eat whether it’s heated or not.

Mexi-Cincy Chili

This “chili” dish is actually served on top of cooked spaghetti. It’s commonly served this way in Cincinnati, OH. The chocolate ingredient is a take-off of Mexican mole’ cooking. It is often served with black beans instead of or in addition to beef, and is usually accompanied by shredded cheddar cheese on top. If you don’t have real cheese on hand in your food storage, you can also use Velveeta on top for serving.

1 can of canned beef (about 16 ounces)
1 tablespoon of granulated onion
2 tablespoons of minced garlic
2 cans of diced tomatoes. (You can use stewed tomatoes as well)
1 8 oz. can of tomato sauce
1 cup of water
2 tablespoons of chili powder
1 tablespoon of unsweetened cocoa powder
½ teaspoon of ground cinnamon
¼ teaspoon of ground allspice
8 - 10 oz. of cooked and drained spaghetti

Sautee the beef, onion and garlic in your intended cooking pan (pressure cooker or Dutch oven). Cook and stir with a wooden spoon to break up the lumps and until the beef is heated through (about 4-5 minutes). Add the tomatoes and their liquid, water, tomato sauce, chili powder, cinnamon, cocoa, and all spice. If you’re cooking this in a Dutch oven, simply cook it low and slow for about 8 hours stirring occasionally.

If you’re cooking this in a pressure cooker, cover and bring the pressure cooker to low pressure. Cook for about 30 minutes for maximum flavor. You can use the quick release method when the time is up.

Top the spaghetti with your cooked mixture and enjoy!

Copyright 2009 Kellene Bishop. All rights reserved. You are welcome to repost this information so long as it is credited to Kellene Bishop.

Preparedness Pro Note: If you would like Kellene Bishop to present an Emergency Preparedness message for your community or church group, please contact us at 801-788-4133. Ms. Bishop is an experienced speaker on Emergency Preparedness topics and also has created a great “Preparedness Party” platform which makes the learning of such a topic more enjoyable for all.

Thursday, April 2, 2009

Why You Should Store Food NOW

There are many who I share my expertise with who inevitably ask me, “Come on, Kellene. Your practices are good in the event that there’s a cataclysmic event, but what’s to say that all of your food storage won’t just be destroyed with the catastrophe?”

And so, in appreciation of those who require me to work harder and speak clearer, I dedicate today’s article.

First of all, it’s a myth for you to believe that your food storage is solely for the purpose of surviving a catastrophic event in nature. Emergency preparedness of food stores is indeed useful for such an event, but it is not isolated to such. I’m sure I’m not the only one who’s heard stories of individuals who lived off of their food storage as the result of the loss of a job in their family or other hard financial times. While this is a common occurrence I hear in today’s economic climate, it is still not the primary reason why foods should be stored. It’s merely a scratching of the surface. And besides, even that isn’t reason enough for many because hundreds of thousands may rely on food stamps or help from their church in the event of a job loss anyway. So such motivation may not be enough to actually initiate food storage action. Let’s see if the following considerations do the trick for you.

Chemical Tainting or Recall: If you have ample supply of food, then in the event a food has been recalled suddenly or is known to have chemical impairment, you won’t have to do without.

Rationing: Recently big warehouses and grocery stores were rationing the purchase of wheat and rice. Such a ration has not been implemented in our country since the days of the Depression. This is in part because many foreigners have been buying up our supplies in order to feed their struggling nations as well as the fact that we have been exporting a significant portion of our wheat and other staples due to the famines which have affected 3rd world countries. If you have a years supply of food, then you are impervious to the effects of such rationing actions.

Diminishing U.S. Food Production:
Over the last 5 years we have lost over 90% of our farmers to exorbitant costs of farming, farming regulations, bankruptcy, bad seed crops, and many more who have stopped growing food and instead are growing “fuel.” Fewer members of our population even know how to garden for themselves, let alone the number who actually do. The small farmers are now under threat with a new intrusion on their way of life, bill HR 875. This bill threatens to eliminate over 90% of the small farmers and to heavily regulate where they can sell their goods and how. Again, if you have a years supply as well as some accompanying knowledge of sprouting, then your dinner table will be unaffected by these awful intrusions.

Devaluation of the Dollar: In addition to the cost of food increasing in the nation, (due to the diminishing supply of it) the money we use to buy the food is becoming worth less. It boils down to supply and demand. Since the Federal Reserve is mindlessly printing up trillions and trillions of dollars without any accounting to the public just how much currency is in circulation at one time, the value of the dollar is taking a nose dive. In fact, thanks to the inflation rate which has been controlled by the Federal Reserve since 1913, the value of the 1913 dollar has now been diminished to a mere four cents today. So, if you purchase your food now, then when there is finally an economic reckoning in the future, your family will still survive.

Food for thought, folks. (Yes. Pun intended)


Copyright 2009 Kellene Bishop. All rights reserved. You are welcome to repost this information so long as it is credited to Kellene Bishop.

Preparedness Pro Note: If you would like Kellene Bishop to present an Emergency Preparedness message for your community or church group, please contact us at 801-788-4133. Ms. Bishop is an experienced speaker on Emergency Preparedness topics and also has created a great “Preparedness Party” platform which makes the learning of such a topic more enjoyable for all.

Tuesday, March 31, 2009

“Meet My Friends, Mr. Smith and Mr. Wesson”

You’ve Got it All—Now How Do You Keep It?

After years of concerted efforts, budgeting, canning, lifting, organizing and educating, you feel reasonably confident that you finally have enough food, water, and other emergency supplies to last you one year. But here’s the real question. Now that you have it all, how are you going to ensure that you’ll get to use it when all heck actually does break lose?

I’ve posed this question to many and I’m dismayed to hear many of their responses.

Some say that they will willingly share their supplies with others. Guess what? So will I, if necessary. But don’t you want to be able to decide who you will share your goods with? Unfortunately, that’s not likely to happen with any reasonable regularity.

Here’s why.

Suppose that an earthquake hits your area. (Where I live in the Wasatch Front of Utah, we’re right on a fault line and scientists say we’re due for a doozey of an earthquake. If you live in the Midwest near or in the states of Missouri, Tennessee, (comprising the Mississippi Valley) you are squarely on the New Madrid fault which is expected to have a 6.7 magnitude earthquake any time now. So I think this is a reasonable scenario for many, if not all of our readers.) Suppose that your home was somehow miraculously spared any severe damage to the point that you aren’t forced to flee elsewhere for shelter. What are the ramifications that you will still have to concern yourself with?

First, ask yourself how many prisons or jails are within a 60 mile radius of you. Are their walls built to sufficiently withstand an earthquake? If they are, will there be sufficient security available in the midst of a catastrophic earthquake to keep the prisoners confined inside? In the event of structural damage, do you really think that the criminals who are suddenly released from their prison walls, with no family or friends nearby, aren’t going to be on the prowl for survival supplies? Do you think they would just stroll into their local grocery store and purchase what they need?

How many violent gangs do you have in your area? There are over 21,500 active gangs in the U.S. at present. According to the FBI, there are estimated to be over 1,000,000 gang members in the U.S. who commit 80% of the crimes in our country. Are you aware that MS-13 is the most violent gang of them all and has permeated at least 42 states in the U.S.? One has to commit murder to get in the gang, and die to get out. (see http://www.usatoday.com/news/nation/2009-01-29-ms13_N.htm) Do you really think that in a time of chaos that they won’t be in search of appropriate supplies to sustain their group at all costs? Think they are going to ring your doorbell and ask you nicely for some rice and water?

Now let’s consider the abundance of drug addicts who live among us. There are currently over 7 million regular illicit drug users in America. Of course some of them will perish in such a catastrophic event, but the statistic of drug addicts comprising 2% of our current population will still hold true. Are you prepared to ward off 2% of the population suddenly unable to access their drugs? Due to the force of nature, millions of drug users will be unable to obtain their “fix” and will do whatever they need to do in order to obtain more drugs. (http://www.policyalmanac.org/crime/archive/drug_abuse.shtml)

What if it’s not something so sinister? What if a desperate mother or father finds themselves in need of vital food, water, and medical supplies for their children? Can we rely on all of society, including desperate parents, to behave rationally as they watch their loved ones struggle? How long could you watch your children suffer before you’re desperately inclined to press the borders of honesty and decency to get what you need for them?

Let’s not forget the overall lawlessness and rampant looting which has consistently erupted in the event of chaos and panic (Can you say New Orleans or Los Angeles anyone?). Then there are the issues of actual law enforcement making an appearance, but attempting to infringe unconstitutional requests on the survivors. (See http://tinyurl.com/cpb7m9)

Do any of these issues potentially expose your family to the risk of being subjected to violence? Do these instances compromise your security or survival in the event of a catastrophe? So, don’t you think it’s just a bit naïve to believe that you’ll be fully permitted to go along your merry way and freely use your emergency preparedness supplies as you see fit? I think so. And yet so many I discuss preparedness with fail to recognize this important aspect of truly being prepared.

Let’s leave the motivation for food and supplies for a moment. Being subjected by irrational people with a sense of entitlement to your wares is not the only reason why lawlessness may come into your life. What about the paranoid, desperate individuals who are only capable of dealing with stress and chaos by taking virtue and life from others? This isn’t just about whether or not you’d be willing to share your food and water with complete strangers. This is also about protecting the health and well-being of your loved ones in a time of chaos.

Please don’t be misguided into believing that the streets will be patrolled by the U.S. National Guard or your local law enforcement. The local law enforcement doesn’t show up in record time now, and not until the crime has already been committed. Do you think you’d get any kind of a worthwhile response time when the streets are littered with all manner of huge debris? In all likelihood, as we saw from Hurricane Katrina, the law enforcement personnel will either be taking care of their own families or they will be answering the call of their Commander in Chief to what he sees as a priority. A rape here, a robbery there, and a shooting there are not going to mean much to a military leader when he’s dealing with other emergencies such chaos can unleash. Yep. You’re on your own folks. FEMA government officials have announced repeatedly that it could be days, if not weeks before they would be present in a disaster zone.

So, the next time you decide who you’re going to share you emergency supplies with, you may want to consider your friends Glock, Winchester, and Smith & Wesson as a part of those decisions, along with enough ammo and SKILL to properly defend.


Copyright 2009 Kellene Bishop. All rights reserved. You are welcome to repost this information so long as it is credited to Kellene Bishop.


Preparedness Pro Note: If you would like Kellene Bishop to present an Emergency Preparedness message for your community or church group, please contact us at 801-788-4133. Ms. Bishop is an experienced speaker on Emergency Preparedness topics and also has created a great “Preparedness Party” platform which makes the learning of such a topic more enjoyable for all.

Thursday, March 26, 2009

Cheese Wax Will Save Us All

Well, at least those of us who are addicted to cheese anyway.

Can you name at least 10 different kinds of cheese that you love?
Do you believe that cheese should be its own food group?
Are you helpless to abide by your diet unless it involves huge amounts of melted cheese?
Then this article is for you!

So picture this. It’s a bona fide emergency survival situation. You are holed up in your home and living off of the emergency preparedness supplies you stored. And you’ve got one heck of a hankering for some yummy melted cheese. But you’re just not in the mood for the Velveeta, that nasty powdered stuff, or the “squirt” kind of cheese. You want a good solid bite of a yummy Monterey Jack, or Swiss, or sharp cheddar. (I’m making myself drool even as I write this.) But hey, cheese doesn’t store for a very long time, right? Well, in this case, I’m happy to tell you that you’re wrong. And if you’re a true cheese addict, then you’ll be happy to hear me tell you that you’re wrong for once, right?

So here’s the good news. You CAN have your favorite cheese on hand, even in an emergency, and even though no stores are open and you have no access to electricity. All you have to do is buy the blocks of cheese that you want now in order to have them stored for up to the next 25 years. Cheese wax prevents your cheese from developing mold or bacteria and it keeps the moisture in. Simply use a natural boars hair brush to apply the melted cheese wax liberally to your block of cheese, let it harden, and then, VOILA, you’ve got your wish. Cheese treated with cheese wax will store for up to 25 years at a mild to cool temperature. Sure, it will continue to age. But it sure won’t get moldy! Be sure that you select block sizes of cheese that you and your family can easily consume within a 3 to 5 day period in order to avoid it going bad once you’ve cut into it.

A couple of tips you should know though.
1) Don’t use paraffin wax. It tends to crack. And cheese wax warms at a cooler temperature and thus plies better to your cheese shapes and sizes. Cheese wax is also less crumbly and you can use less of it than paraffin.
2) I have yet to find a cheese that I can’t wax. So long as it’s hard enough to be in a block, you can wax it.
3) You don’t need cheesecloth, but if you desire to use it prior to your wax layers, it may be helpful getting the wax off. I’ve not had any problems without it though.
4) It’s best to melt the cheese wax in a double boiler as opposed to direct heat.
5) The less you handle the cheese with your hands the better.
6) Don’t bother with dipping the cheese. Your natural finger oils may cause cracking of the cheese wax. Use a natural boar’s hair brush instead. The reason why you want to use this kind of brush specifically is because other brushes will apply the cheese wax too thick, or with crevices, etc. This kind of brush is perfect for cheese waxing.
7) You don’t need to use food-grade labels for your cheese since they will go on the outside. However, it’s smart to use a label on the outside of your cheese just prior to the last wax layer. That way you don’t have to worry about it falling off. Be sure to label not only the kind of cheese it is, but when it was waxed as well.
8) Don’t store your waxed cheese in additional containers. Just stack them on top of like cheeses and let them breathe. I like to hang them from the ceiling in a “fishing net” kind of contraption.
9) Be sure to check for pockets or crevices that didn’t get sealed. 3 thin layers of wax is a good practice. There’s no need to do more coats than that.
10) The cheese surface should be clean and dry prior to waxing.
11) If your 2nd and 3rd coats are applied while the prior coat is still a bit warm you will get a better adhesion.
12) Cheese wax can be re-used several times. You can simply wash it in warm water, let it dry and then re-melt it. So when you remove cheese wax from your cheeses, you can simply reheat and reapply. Simply heat the cheese wax to about 110 degrees Celsius. This will also ensure that you’re not transferring any bacteria or unnecessary moisture to your new cheese.
13) You do not need to filter the cheese wax after you melt it. So don’t worry about that step.
14) Your first coat will have some unevenness to it. Don’t worry. The 2nd and 3rd coat will even it out just fine.

Cheese wax can be located at multiple places online or in your local health food stores. You should also have no problem finding a boar bristle brush either. It doesn’t really matter what color of cheese wax you use.

Once you get the hang of this cheese waxing stuff you can progress to making your own cheese from powdered milk in any flavor you decide! Yummy!

Enjoy the recipe below!

Kristen’s Cheesy Roughin’ It Enchiladas

1 can of tomato soup
1 can of cream of chicken soup
1 regular sized can of enchilada sauce
2 cups of canned chicken, drained.
About 2 cups of your favorite shredded cheese

Make your sauce by combining the soups and the enchilada sauce.

Use enough flour or corn tortillas to line a large baking dish or Dutch oven with your enchiladas. (About 12 to 15 depending on how big you stuff them) Be sure to spray your dish with some cooking spray.

Lightly coat the bottom of our tortilla with the sauce. Then add about 2 tablespoons of chicken, according to your desire. Then top the chicken with about 2 tablespoons of cheese. Add about 1 tablespoon soup mixture. Then roll up your tortilla and place seam side down in the dish. Continue until you’ve filled the dish a single layer deep. Once you’re finished, pour the remaining sauce over the top and top with the remaining cheese. Bake at 350 degrees for about 30 minutes until the cheese is completely melted. You can add chopped black olives, black beans, rice, jalapenos, or even green chilies to this recipe as well.

Copyright 2009 Kellene Bishop. All rights reserved. You are welcome to repost this information so long as it is credited to Kellene Bishop.


Preparedness Pro Note: If you would like Kellene Bishop to present an Emergency Preparedness message for your community or church group, please contact us at 801-788-4133. Ms. Bishop is an experienced speaker on Emergency Preparedness topics and also has created a great “Preparedness Party” platform which makes the learning of such a topic more enjoyable for all.